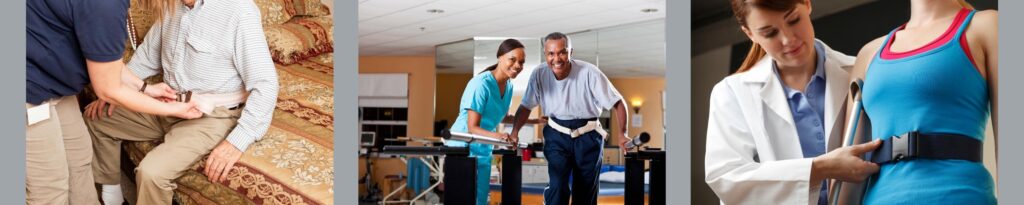
A gait belt—also called a transfer belt, walking belt for seniors, or even a medical belt—is one of the simplest yet most effective mobility aids available. It provides support and stability during transfers, protects caregivers from strain, and reduces the risk of falls for patients.
When used correctly, transfer belts promote independence, improve mobility, and ensure safer transfers for seniors and patients at risk of falls. This guide explains the benefits of gait belts, preparation, positioning, and safety tips for caregivers, nurses, and physical therapists.
Benefits of Using a Gait Belt
Gait belts, often misspelled as gate belts, are versatile patient safety devices commonly used in hospitals, nursing homes, and at home. They’re also a common tool in physical therapy (PT) to rebuild strength and mobility.
Key benefits include:
Elderly fall prevention: Lowers the risk of falls during transfers and walking.
Injury prevention: Protects caregivers’ backs while assisting patients.
Cost-effective: Cheaper and simpler than mechanical lifts.
Multi-purpose use: Functions as a belt to help lift seniors, guide walking, or stabilize during therapy.
How Gait Belts Support Mobility and Independence
Assist with transfers: Provides stability when moving from bed to wheelchair or chair.
Enhance daily activities: Transfer belts help seniors complete tasks like dressing or toileting with less risk.
Facilitate therapy: Physical therapists use gait belts in PT to safely help patients practice walking and transfers.
Preparing for Use
Before using a transfer belt, preparation is key:
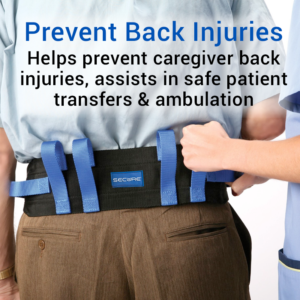
Select the right belt: Choose the length, width, and material based on the patient’s needs.
Check sizing: Ensure a snug but comfortable fit around the waist.
Fasten securely: Confirm the buckle is locked before beginning movement.
Prioritize hygiene: Keep the medical belt clean and always wear it over clothing to prevent skin irritation.
Proper Positioning
Positioning affects safety and comfort:
Place the belt around the waist, aligned with the center of gravity.
Avoid placing it too high or too low.
Adjust tightness for support without restricting breathing.
Double-check buckle security.
Maintain communication with the patient during transfer.
Tips for Safe and Effective Use
To ensure safe transfers:
Avoid mistakes such as poor placement or incorrect sizing.
Use mechanical lifts if a gait belt isn’t suitable.
Always keep a layer of clothing under the belt.
Train caregivers in safe practices for elderly fall prevention.
Use two caregivers when assisting heavier or unstable patients.
Why Gait Belts Are Essential
A gait belt—whether called a transfer belt for elderly, gate belt, or walking belt for seniors—is a trusted patient safety device for hospitals, long-term care, and home caregiving. It reduces fall risks, prevents injuries, and supports independence.
For seniors, people with disabilities, and anyone at risk of falling, gait belts are reliable mobility aids that make transfers, walking, and therapy safer. By using them correctly, caregivers and healthcare professionals can ensure both comfort and security.
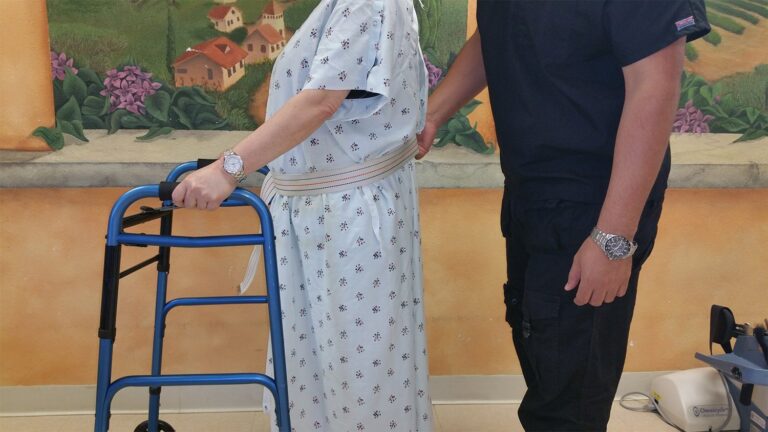
Step-by-Step: How to Transfer a Patient with a Gait Belt
Follow these steps to ensure safety for both patient and caregiver:
Explain the process
Tell the patient what you’re about to do to reduce anxiety and encourage cooperation.
Position the gait belt
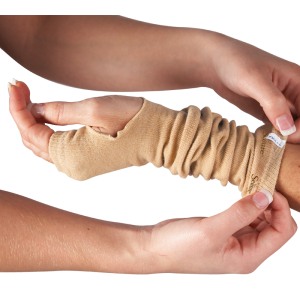
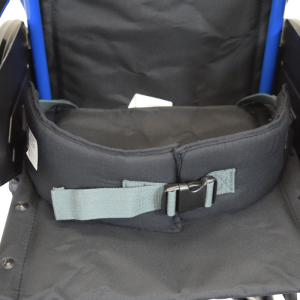
Wrap the belt snugly around the patient’s waist, over clothing (not directly on skin).
Make sure the buckle is centered and fully secured.
Check fit and comfort
The belt should be snug but not tight—you should be able to slip two fingers underneath.
Prepare the environment
Remove obstacles and make sure the wheelchair, chair, or bed is secure and locked.
Use proper body mechanics
Bend at your knees, not your back.
Keep your feet shoulder-width apart for stability.
Assist the patient to stand
Place your hands firmly on the belt (or use handles if available).
Ask the patient to push from the bed or chair while you guide them upward.
Pivot and transfer
Guide the patient in a controlled pivot motion toward the target chair or bed.
Encourage small steps if needed.
Help the patient sit safely
Slowly lower the patient into the chair or bed, keeping a firm grip on the gait belt until they are stable.
Remove the gait belt
Unbuckle carefully and store the belt for future use.

 Reduce Infections
  Reduce Costs